How to Roll Oats at Home: Step-by-Step Beginner's Guide
Rolling your own oats at home sounds like a craft project reserved for enthusiasts with industrial equipment, but it's surprisingly straightforward. Whether you're chasing fresher breakfasts, curious about the whole process, or simply want to know what's actually going into your porridge, this guide walks you through everything—from sourcing whole grain oats to storing your first batch.
Why Roll Your Own Oats?
Fresh rolled oats taste noticeably different from supermarket boxes that have sat on shelves for months. You'll notice the sweetness, a subtle nuttiness, and a texture that doesn't turn to mush the moment hot water touches it. Beyond flavour, rolling at home lets you control the thickness—thick flakes for chewier porridge, thin ones for overnight oats or baking.
The process also demystifies what "rolled" actually means: groats (the inner kernel) are steamed and pressed flat. That's it. No additives, no mysteries. If you've ever wondered why commercial oats sometimes taste cardboardy despite the promises on the packet, you're about to understand the difference a few hours makes.
Equipment You'll Need
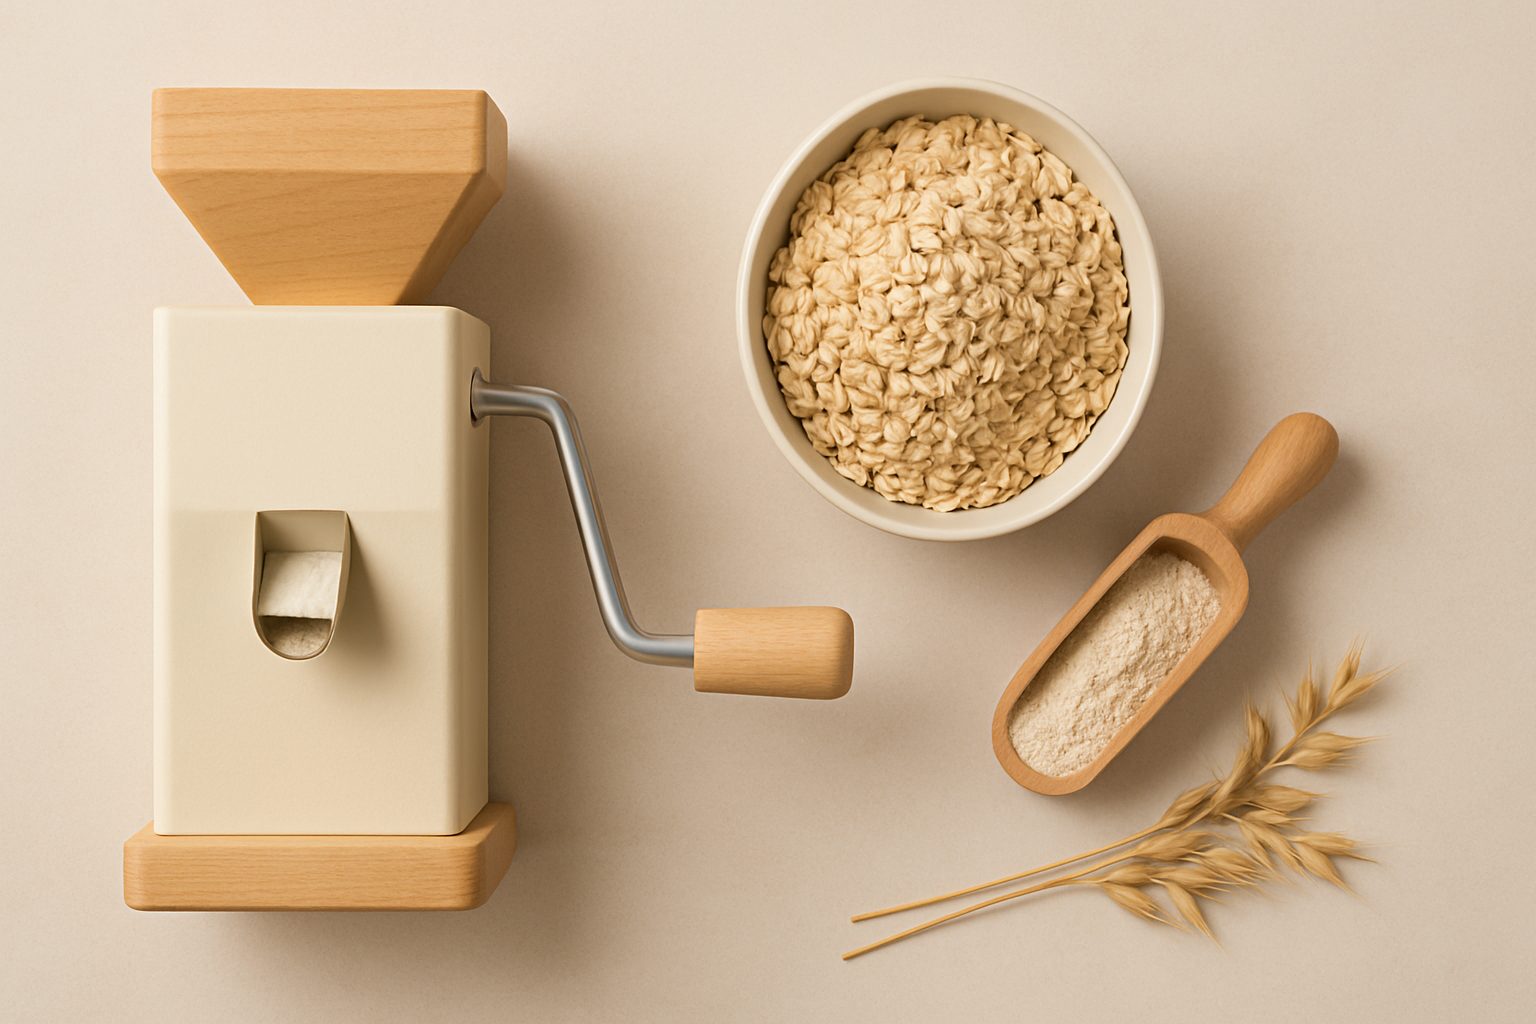
You don't need much. The essentials are a grain roller (also called a flaker)—this is the heart of the operation—plus a few basics you probably already have.
Core equipment:
- A grain roller. This is the non-negotiable piece. Manual rollers are cheaper and work fine for home quantities; electric ones save effort if you're doing this regularly. Most UK suppliers stock models ranging from £30 to several hundred pounds depending on build quality and capacity.
- A steamer or large pot with a steamer basket (to prepare groats)
- A baking tray or wooden surface for drying
- A fine sieve or colander (to remove chaff and dust)
- Airtight containers for storage
You might also want a kitchen scale for consistency, especially once you settle into a routine.
Sourcing Whole Grain Oats
This matters more than most people realise. You need whole oat groats, not cut oats or steel-cut oats. The difference: groats are the complete kernel with nothing removed, which is what you'll roll. Cut or steel-cut oats are already chopped, so rolling them does nothing.
In the UK, health food shops usually stock them, though quality and price vary wildly. Bulk suppliers like Neal's Yard Remedies and some farmers' markets sell decent quality at better prices. Online, you'll find decent options through larger health retailers—look for organic if budget allows, as it means fewer pesticide residues on the grain itself. You can also order directly from mills; a quick search finds several that dispatch nationwide.
A word on quantity: Start with 500g to 1kg. Rolling takes time initially, and you want to know whether you'll actually use the result before committing a larger batch.
The Rolling Process: Step-by-Step
Step 1: Inspect and rinse
Spread your groats on a tray and pick through them. You're looking for stones, debris, or discoloured grains—they're rare, but one overlooked bit of grit will ruin your teeth and your day. Rinse the groats thoroughly under cold running water and drain well.
Step 2: Steam the groats
This is crucial and often skipped by beginners. Steaming softens the groat, making it rollable without shattering. Bring water to a boil, add your groats to the steamer basket (they should sit in a single layer), and steam for about 8–10 minutes. They'll soften noticeably but shouldn't become mushy. You're aiming for something between raw and porridge.
Let them cool to room temperature—about 30 minutes. They'll firm up slightly as they cool, which actually makes them easier to roll.
Step 3: Roll the oats
Run the cooled groats through your grain roller according to the machine's instructions. Most manual rollers have a screw adjustment to set thickness. Start with a medium setting; you can adjust next time if you want them thicker or thinner. The whole batch will come through in flakes—some slightly chunky, some finer. This is normal.
Step 4: Dry the rolled oats
Spread them on baking trays in a single layer and allow them to dry at room temperature for 24–48 hours, depending on humidity. You can speed this with a very low oven (100°C, door cracked open) for 1–2 hours, but air-drying is gentler and preserves more of the subtle flavour. They should feel completely dry to the touch and not clump when you press them.
Step 5: Clean and remove chaff
Once dry, sieve the oats to remove fine dust and any remaining chaff. A gentle shake through a colander removes most loose debris. Some chaff will remain embedded in flakes—this is fine and adds fibre, but removing what you can improves texture.
Storage and Shelf Life
Rolled oats contain natural oils, so they'll go rancid if left exposed. Store in airtight containers in a cool, dark cupboard—they'll keep for 4–6 weeks easily, sometimes longer if you're religious about airtightness and keep them out of direct sunlight. If you notice a soapy or off smell, they've oxidised; discard them.
Refrigerating or freezing extends shelf life if you've rolled a larger batch or live somewhere warm and humid.
Common Mistakes to Avoid
Skipping the steam step. Unsteamed groats splinter instead of rolling into flakes. You'll end up with oat granola, not rolled oats.
Over-steaming. Groats that have turned soft and mushy will come through the roller as pulp. Aim for just softened.
Rolling when still warm. Warm groats are too fragile. Wait for them to cool and firm.
Storing damp oats. Any moisture left in the container will cause mould within days.
Next Steps
Once you've rolled a batch and tasted the difference, you'll likely want to explore thinner flakes, different oat varieties, or higher-volume production. At that point, comparing grain rollers—particularly which can handle volume without jamming—becomes worthwhile. There's a full comparison of the best home grain flakers elsewhere on this site, with tested models and honest assessments of which suits different kitchen setups.
For now, your first small batch teaches you the rhythm. After that, it's genuinely just: source, steam, roll, dry, store, eat.
More options
- Electric Home Grain Flaker / Roller (Amazon UK)
- Manual Grain Roller for Home Use (Amazon UK)
- KitchenAid / Stand Mixer Grain Roller Attachment (Amazon UK)
- Eschenfelder Grain Flaker (Amazon UK)
- Whole Grain Oats & Wheat Berries (consumable upsell) (Amazon UK)